
We finally have drinkable rainwater at Rally Creek. This past weekend we put the iSpring UVF55FS Ultraviolet filter into our pump house setup. This turned our filtered “bathing water” into potable drinking water. We are waiting on the final results from the Safe Home Ultimate 308 water testing kit, but 48h+ into the final bacteria test the waters looks to be clean and free of pathogens.
The entire setup is fed by the 1500 gallon rain storage system. Now that the baseline configuration is in place we can start finishing construction on the pump house and bath house this coming fall.
You can follow the start of our journey in the related Rally Creek Articles:
Adding The UV Filter
This past weekend we added the final filtration stage to our Rally Creek pump house. This stage added the UV filter which is very effective at killing bacteria that may make it through the carbon filtration system. The carbon filters are good are removing particulates, sediment, and heavy metals but the smaller bacteria and viral loads may pass right through. This last stage bathes the water in ultraviolet light which destroys the cell membrane and kills the bacteria. This has been proven to be a low-energy and low-cost method for treating water in low volume (residential) applications.
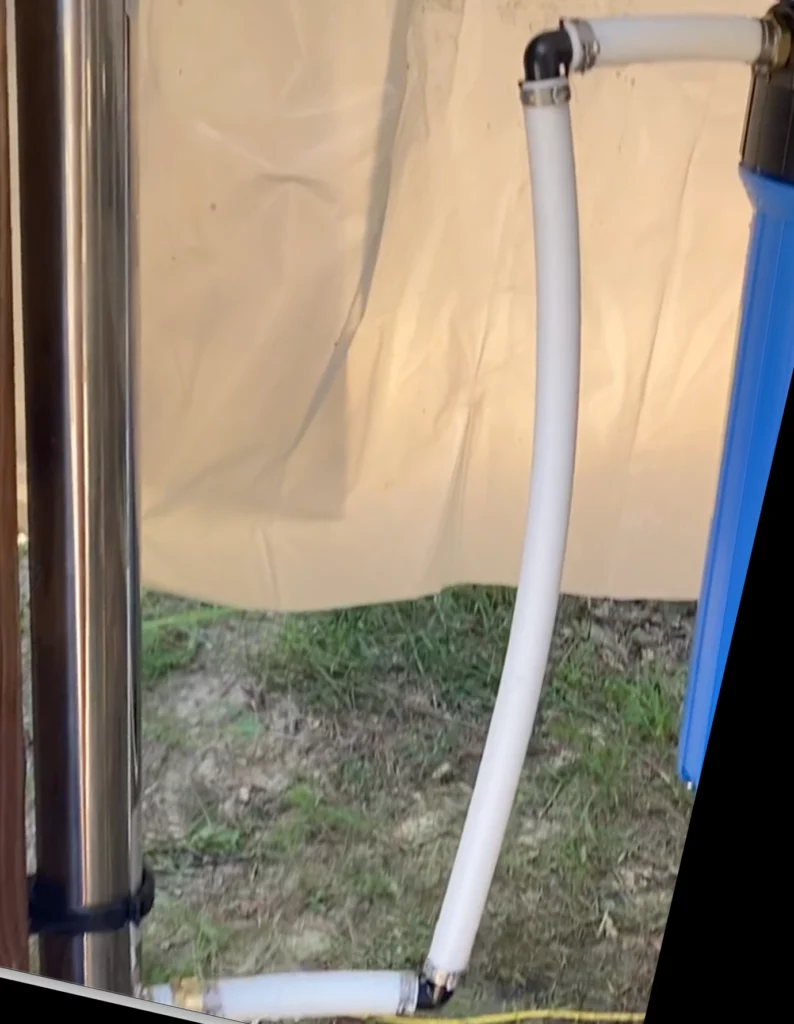
The project started with the sort of simple task of splicing into our existing Pex-line setup after the whole home filter. We had to splice that line and put the UV filter in between the whole home filter and our main 1″ ball valve that we used to control water flow out of the pump house. That part of the project was easy. We’ve kept our entire pump house connected with 1″ Pex throughout. This keeps the flow rate throughout the system consistent without increases in pressure. The entire off-the-shelf component list uses 1″ inlets and outlets, so we feel it best to keep everything on that program.
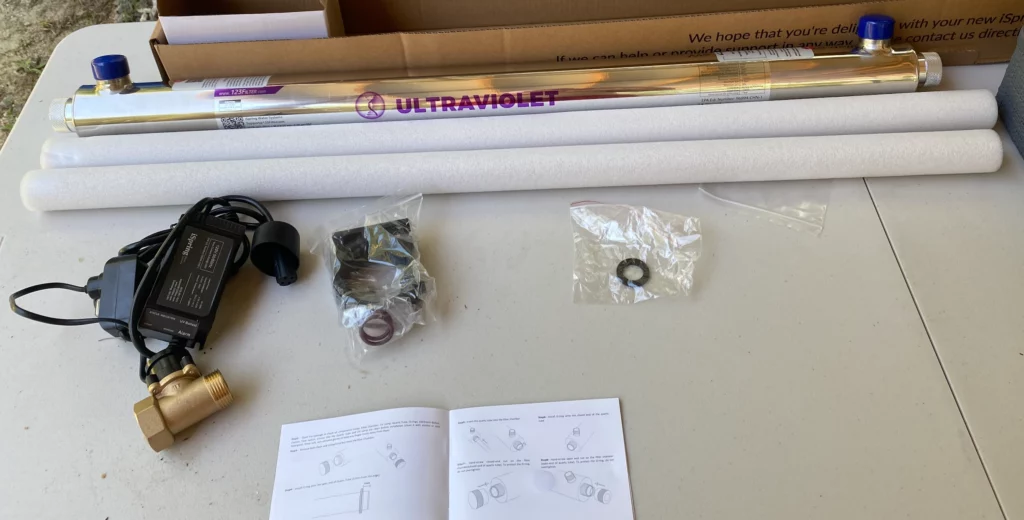
Shopping List
What you will want to have on hand before getting started:
- Some clean gloves that will let you easily hold onto a small glass tube
- (2) 1″ FNPT to 1″ Pex Adapter : $7 each from Home Depot
- ISPRING UVF55FS at Amazon $286
- Teflon plumbing tape
- A couple of long screws to mount the UVF55FS to the wall — in our case a couple of 3″ long exterior wood screws worked well as we are mounting into a 6×6 PT lumber post.
We re-located an already-installed 1″ Pex ball valve for shut off to be positioned AFTER the entire filtration system.
Installing The UVF55FS Ultraviolet Filter
The less-than-stellar instructions in the iSpring UVF55S box left us scratching our heads on how to put that together. Once we had it in place it was obvious what we should have done, but at first glance it was a bit confusing. To save some hassle, I’ll describe what we learned; Do not let this dissuade you the process will still easy despite some initial confusion.
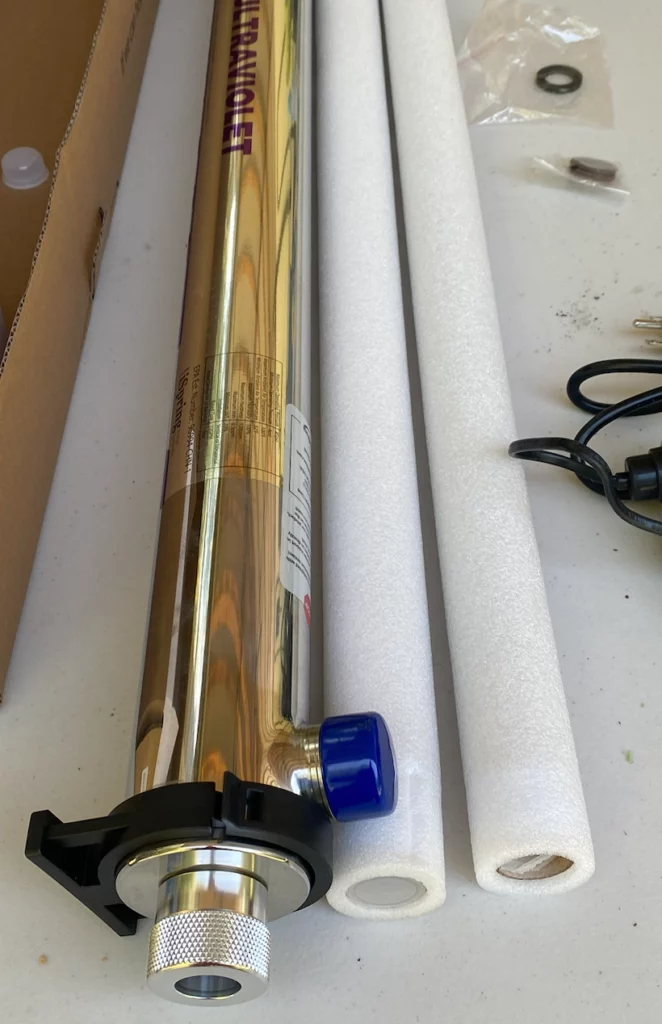
We also chose to mount the UVF55FS vertically as it seems from a physics standpoint that, while marginal, the time of exposure is likely higher in this configuration. It also ensures that should there be an air gap that the UV tube would still have a 360-degree water exposure until the air gap is pushed out of the system. In a vertical configuration the inlet (1″ MNPT) and “closed cap” for the stainless tube (more on that later) is at the bottom. The outlet (also 1″ MNPT) and “open cap” is at the top.
To get started leave the glass tube and UV light in their protective cases.
The Mounting Clamps
Put the two plastic mounting/retainer rings on the steel tube somewhere in between the two 1″ MNTP points (the inlet/outlet). We chose to put these fairly close to the top outlet in case it moves at all post-installation, the outlet will stop it from sliding out of the clamps.
Place the stainless tube with mounting clamps against the wall (post in our case) where you want it mounted. Keep in mind you’ll need to be able to unscrew the open end of the stainless tube and pull out a UV bulb that is the same length from that tube. You’ll need a good 4′ of clearance above the tube to be able to replace the bulb as needed. That means mounting it low enough so you can easily reach this as well — we mounted ours so the top is about 4′ from ground level. Mark the outline of the clamps.
Remove the stainless tube from the clamps. Mount the clamps to the wall.
Setup The UV Filter
Before doing this – MAKE SURE YOU ARE WEARING GLOVES — DO NOT TOUCH THE TUBE WITH YOUR BARE HANDS. Oil can change the reflective & refractive properties and make the UV less effective — but more importantly reflect heat and burn out the UV light prematurely.
This took a few tries, so we’ll give you the shortened version based on a couple of failed attempts to getting this done. In retrospect it is easy, but a few hints would have helped with what was presented in the manual.
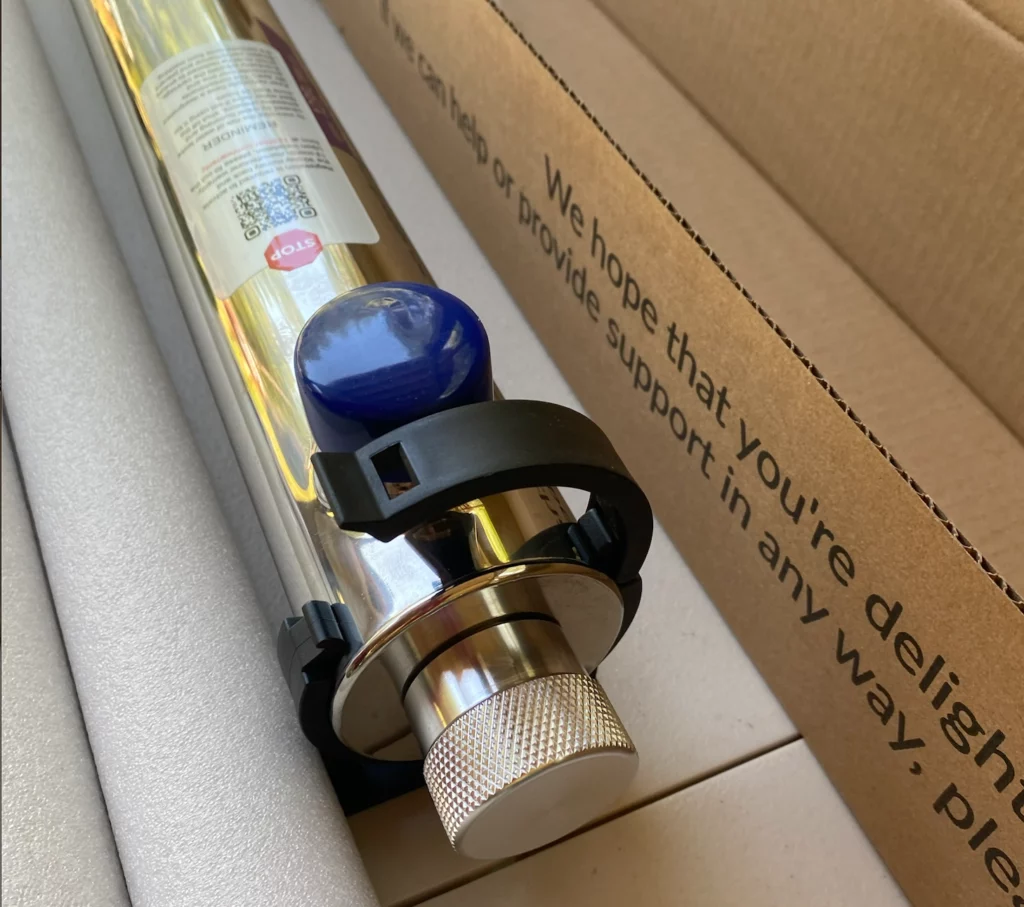
First, remove both end caps from the metal tube — the closed one and the open one. The closed one will be the “inlet end” and the open one will be the “outlet end”. Remember which end is which when doing this setup.
In the box there will be a package with two “round-edged” o-rings. That is what you want to use here. We are still not 100% certain where the larger “flat edged” o-ring is supposed to go, we’ll ignore that one for now.
Install The “Test Tube”
In one of the two protected tubes is a long glass tube. It looks like an oversized test tube that may be from the chemistry shop of the giant in Jack And The Beanstalk. One end of this tube is open. Find that end and slip one of those o-rings onto the end of the tube about 1/2″ down (12mm according to the instructions). About the width of your thumb should be enough.
Slide this protective “test tube” into the inlet end of the metal tube. It will likely get stuck before getting fully seated. If you look inside the “inlet” end 1″ threaded opening you’ll see the tube is bumping against the “metal shelf” (as my wife called it) that is around the small round “test tube outlet hole”. You’ll need to move the glass tube around a bit until you can get the end of it through the small hole — the end of the glass tube should “poke out a bit” from the end of the metal tube. You may find it easiest to have a partner hold the metal tube vertically as you finagle this glass tube into place.
Once you get the glass tube poking out the end, quickly grab the other round-edged o-ring and slide it over that exposed glass end of the tube. Try to snug up both orings on that tube so both the inlet (bottom where the closed cap will go) and top have the o-ring lightly seated near the metal screw-on points for the caps.
Screw on the bottom inlet-side closed-end cap. Be gentle, you don’t want to pinch or distort the o-ring.
Install The UV Lamp
First, find the outlet control valve. It has some wires, and adapter box, and a plug attached to it. You are going to end up attaching the 4-prong control switch cord to the UV light which will go into the glass tube you installed in the last step.
Wearing your gloves, remove the UV lamp from the protective case. Slide it into the glass tube you installed earlier, making sure the 4-prongs stick out of the open end of the UV filter. Make sure you keep a few inches of the lamp out of the tube so you can hold onto it while attaching the cord.
Slide the open-end metal tube cap around the 4-prong cord from the control switch.
Attach the 4-prong cord to the UV lamp.
Gently push the lamp into the tube.
Slide the metal open-ended cap onto the tube and tighten. Do not over tighten as it can damage the o-ring. A damaged o-ring means water can leak into the tube and short circuit your lamp.
Push the dust cover that is already on the lamp cable over open metal cap on the top of the metal tube.
Finish The Installation
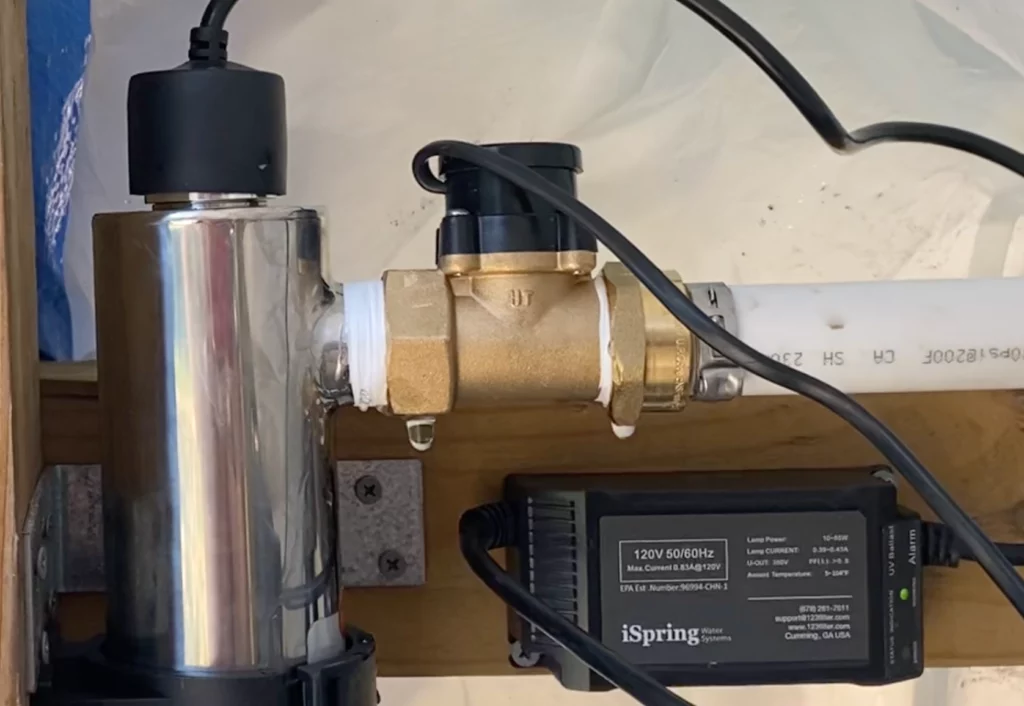
Put some teflon plumbing tape on the outlet (top) 1 inch MNPT on the top of the metal tube.
Screw on the flow control adapter onto the outlet. Make sure the arrow showing flow direction is pointing AWAY from the metal tube. Gently tighten using a wrench.
Now that the UV filter is setup you can install it into the clamps you attached to the wall already. Push the metal tube into the clamps.
Attach the 1″ FNPT to Pex adapter to the inlet side of the UV filter and connect with Pex to the 1″ Pex outlet on the whole home filter.
Attach the other 1″ FNPT to Pex adapter to the valve control outlet.
Attach the 1″ ball valve control to the outlet to allow a “master shut off” of all water from the pump house.
Plug the UV filter into a 110 outlet and switch it to “auto”. This will turn the lamp on as needed when water is flowing and off when the water flow stops.
A Review Of Our Setup
Once we got the UV Filter inline with the rest of our pump house setup we were ready to finalize the installation of the shower and spigot. To review what we have installed at this stage:
The rain catchment storage system is our water source. This is fed to our 1HP rainwater pump with automatic pressure and low water controller. Water flows to a spin down filter to remove large sediment, then into a 3-stage filter that removes finer sediment, various pollutants, and currently a lead filter (we may replace that later). If then flows out of the whole-home filter into the UV filter.
If everything is working well, the rainwater coming into the system comes out as potable water than can be used for drinking, showers, etc.
While we have not yet measure the flow rate officially, it seems to live up to the estimated 7 gpm that we want for being able to shower or wash things down at the end of an “outdoors weekend”.