
We continue our journey toward attempting to filter rainwater to the point where it can be used as daily potable water at Rally Creek. Our previous article outlined the components we were considering for building a filtration system that is fed from our 1500-gallon rainwater catchment system. The idea is to filter the water enough to generate clean water for drinking, showers, and things like that.
Eventually we may consider evolving this system so we have 3 outlets along the route of filtration; Unfiltered: Unfiltered rain water for irrigation, Filtered : post primary filters for grey water systems (toilets, etc.), and UV Filtered : post UV filter for potable water (drinking, showers, washing dishes). That can be for another adventure. For now, we will stick to the single UV Filtered water outlet. Once we are done with the build we will be testing the water with a retail water test kit before daily use.
Filtration System Starting Point
While our original goal was to build out the entire UV Filtered system in one weekend, Amazon screwed us as usual. The UV filter that was supposed to arrive on a Thursday, then on a Friday, arrived on Monday; too late to get it to Rally Creek for installation. So much for “3 day delivery”. Because of this we were only able to setup our system for Filtered water.
This filtration system removes all the particulates from the rainwater collection as well as most chemical and metal contamination like chlorine, lead, and other things like that. It does not have the UV filter so SOME pathogens — mostly small bacteria and viruses can get through. That will be addressed when we go back and put the UV filter on the end of the system.
For now — the primary filtration process.
We start from an existing rainwater collection area (RV port roof – unpainted metal, PVC piping, debris screens, downspouts with debris filter, 6x 275 gallon collection tanks, and some 2″ PVC outlets with valves we inherited form the prior owners.
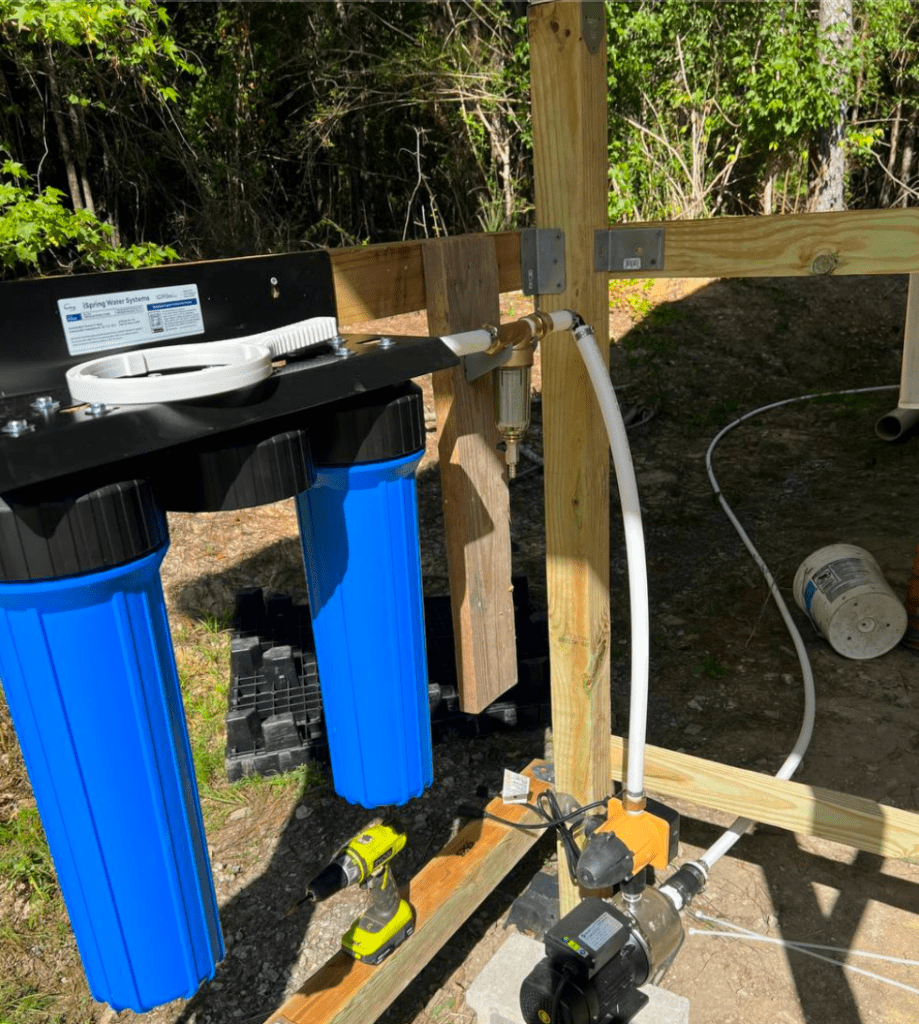
About The Pump House / Filtration System
Our initial effort focused on building a framework for the pump house that would support the filtration system and pumps and getting the main filtration system running. Here we will focus on the water system components versus the construction of the pump house skeleton.
We also did not finish the electrical wiring on this trip. Thankfully we already have a few 20-amp 110 outlets available which is all that was needed for the pump — our only electrical component at this stage of the build.
Rainwater Filtration Shopping List
Most of the components are outlined in the Rainwater To Potable Water article, but we did find we needed some extra items along the way.
I also recommend looking at alternative shopping centers like Home Depot if timeline is a concern. Amazon has a bad habit lately of promising 2 – 5 day deliveries that arrive 3-7 days late.
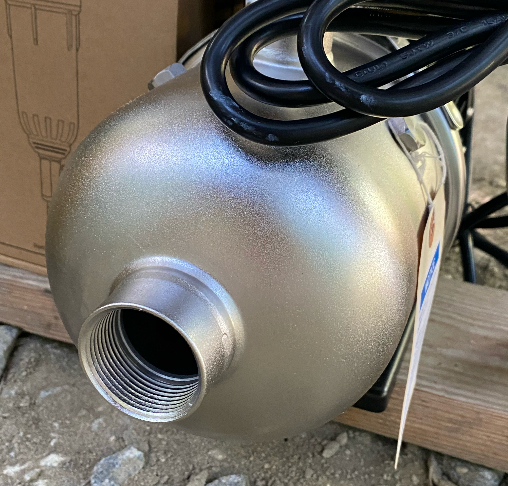
- Pump: RainFlo MHP150A at Amazon : $650 4 day delivery
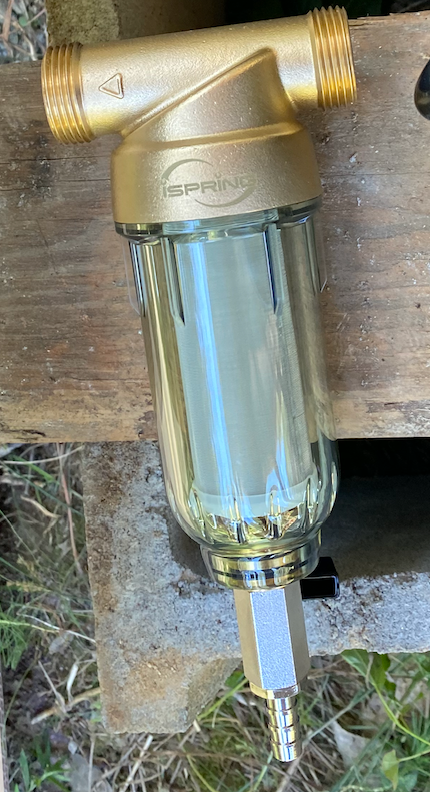
- Spin Down Filter: ISPRING WSP-50 at Amazon $47 3 day delivery
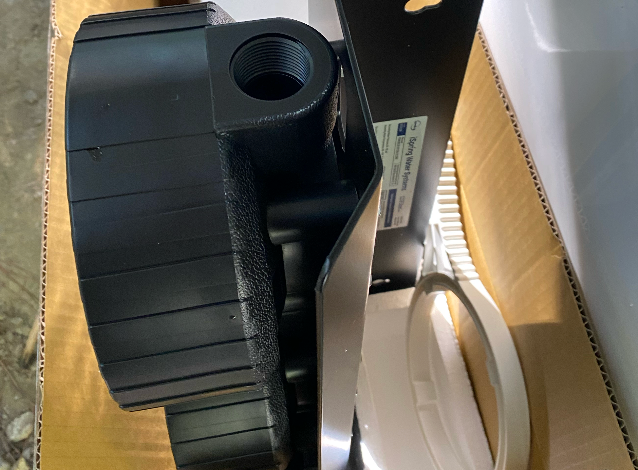
- Whole Home Filter : ISPRING WSP-50 at Amazon $466 3 day delivery
- 3/8″ to 1″ Pex Clamp rings Tool : $65 from Lowes
- Pex Cutting Tool : $13 from Lowes
- 10-pack 1″ Pex Clamps : $11 from Lowes
- 100′ of 1″ Pex Piping : $90 from Home Depot
- 5-pack of 90-degree 1″ Pex elbows (only needed 1 for this build) : $11 from Home Depot
- (1) 1.25″ MNPT to 1″ Pex Adapter : $22 from Home Depot
- (2) 1″ MNPT to Pex Adapters : $7 each from Home Depot
- (3) 1″ FNPT to Pex Adapter : $7 each from Home Depot
- 1″ Pex ball valve for shut off: $13 from Home Depot
- Catchment outlet to 1″ Pex adapters
About The Plumbing Architecture
The plumbing configuration took shape as we were on site where we could measure the rainwater collection outlets and figure out what each piece of the filter and pump system required. All of the pump outlet and filter systems were designed around a 1″ inlet/outlet diameter. This makes is easy to keep the water flow and pressure consistent, but it turns out the connections are a bit of a pain.
Pex Tubing
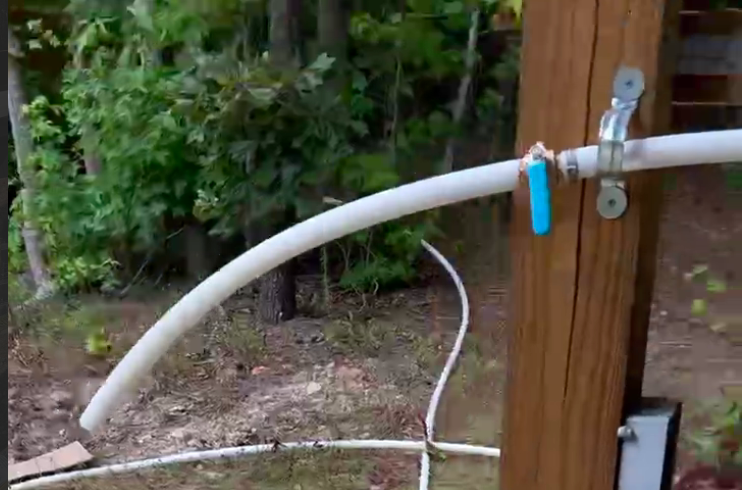
We learned the same lesson many others already write about in their blogs — the simple “connect it together” solution these days is to use Pex. In this case Pex 1″ tubing — which we learned is usually only available in 100′ rolls from places like Home Depot. Make sure you stay consistent with tools and fittings when using Pex. Pex fittings are different from EvoPex and they do not all fit together as well as they should. If you are using Pex tubing (A or B) do not mix-and-match or you will need more tools to make it work. We stuck with Pex B for the entire build.
Note: Pex tubing is NOT FOR OUTDOOR USE. UV rays from sunlight will break down the plastic quickly leading to breaks and leaks.
Note: We heard from multiple people to try to avoid the Sharkbite Compression style fittings and instead use clamps (easier to work with) or crimp style connectors.
Learn more about Pex:
Bob Villa Article all about Pex
Williams Article about Pex A vs Pex B
Rally Creek Initial Configuration
We used 1″ Pex B throughout which mean a lot of 1″ MNPT and FNTP to Pex adapters, 1″ Pex Clamps, and some other fittings.

- Rainwater collection outlet , adapters down to
- 1″ Pex connector (barb)
- 25′ of 1″ Pex
- 1.25″ Male Screw In Connector (1″ MNPT) – Pump Inlet
- Pump
- 1″ Female Screw In Connector (1″ FNPT) to 1″ Pex – Pump Oulet
- 2′ of 1″ Pex
- 90-degree 1″ Pex elbow
- 6″ of 1″ Pex
- 1″ Pex to 1″ FNPT – Female screw in connector for spin down filter
- Spin Down Filter – has two 1″ male connectors
- 1″ FNPT to 1″ Pex – Female screw in connector for spin down filter outlet
- 6″ of 1″ Pex
- 1″ Pex to 1″ MNPT – Male Screw In Connector for Whole Home Filter Inlet
- Whole Home Filter
- 1″ MNTP to 1″ Pex – Male Screw In Connector for Whole Home Filter Outlet
- 1′ of 1″ Pex
- 1″ Pex Shut Off Valve
- 2′ of 1″ Pex for water output
Our pump and filter components:
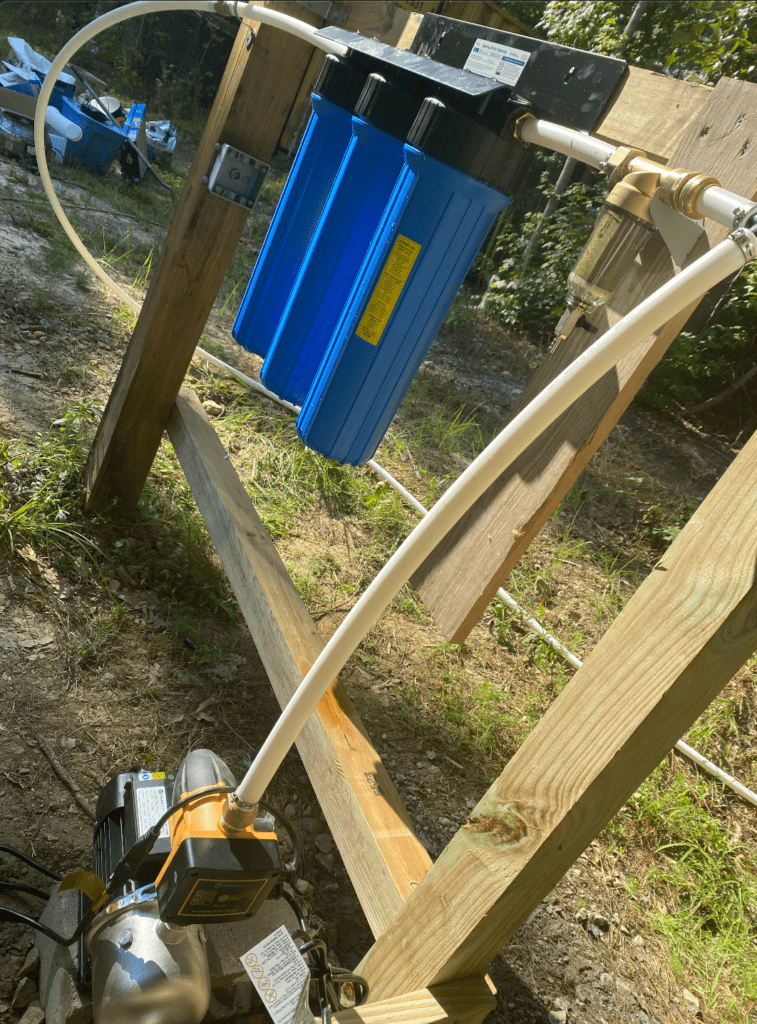

Pump and Filter Installation Notes
Once we got the hand of using the Pex clamps and crimping tool things went fairly quickly. We unrolled the 100′ of Pex and cut the pieces we needed. The cutting tool made quick work of it. Cutting pex was easy. Crimping the stainless steel pex clamps took a bit more work.
Our bigger challenge was finding all the right parts at Lowes and Home Depot. Lowes SHOULD have all the parts you need, but as usual some key components were missing due to low/no-stock. That mean a second trip to Home Depot and hour later to find the missing pieces. It also meant coming up with some “creating solutions” to get our rainwater collection tank water plumbed into our pump inlet. Lowes and Home Depot do not carry 1 1/2″ MNPT to Pex adapters in stock. In fact neither carry very much 1″ adapters for Pex. It seems like 3/4″ and 1/2″ are the standard indoor plumbing sizes — but we didn’t want to restrict water flow and increase pressure BEFORE the pump and filter. As a side note — you can order the 1 1/4″ to Pex adapters online from Home Depot but they are expensive.
Once we got the pump connected and pushing water up to the filtration “board” in our “pump house” (pump house framing for now) things went quickly. We did straight-line pex connections with 1″ end-to-end from the pump to the spin down filter to the whole home filter. The outlet went to a 1″ ball valve with a simple piece of 1″ pex hanging off the end.
Before starting the pump it needs to be primed. This involves removing a plug in the pump housing and filling it until water spills out. It turns out our 25′ of pex needed to fill up as well, so it was taking way too much water. It was also difficult to fill this housing without a filter. We soon realized that if we open the outlet on the water collection tanks it may prime the pump for us. We left the plug out on the pump housing and opened the rain collection outlet valve. The water rushed down the pipes and into the pump where it soon started shooting out of the plug hole. This turned out to be a quick way to prime the pump as it sits below the max height of the water collection tanks. Our pump is about level with the rainwater outlet , which means that unless those tanks are empty this should make for a quick prime and less work for the pump to pull in water.
When we first started the pump and it “charged up” all the filters we did see water flow within a few minutes. But there was a problem, the water flow was very weak. Maybe 1-2 gpm max. That is not enough. And no pressure. After checking the pump and the inlets, we tried again. Same problem.
I noticed the water flow in the spin down filter was ok, but there was a lot of air in that part of the system that was not getting pushed out. Opening the drain on the bottom of the spin down filter cleared the air lock. Once it was closed the water pressure and output increased significantly — more than enough for showering.

When we wrapped up for the day we had filtered running water that looks clear. We didn’t shower in it because we had not tested it yet. We want to get the UV filter connected before we do a water test and shower — that will be on the next visit.
For Next Time : Finishing The Filtration System
We now have the UV filter (we cancelled the Amazon order and got it from Home Depot for the same price). On our next trip up we will put the UV filter after the whole home filter using the same 1″ Pex connectors. This requires a short piece of pex to run to the bottom of the UV filter (it mounts vertically) which will have a 1″ male connector thus requiring a couple more 1″ FNPT to 1″ Pex adapters.
We will reconnect our ball valve on the outlet side , then a T-connector that drops from the 1″ pex on the input to two 3/4″ pex on the outlet sides. Since there are a lot more options for 3/4″ pex we will use that for all of the plumbing fixtures, reducing down from 3/4″ to 1/2″ on a case-by-case basis. On the two 3/4″ outlets we will add two garden hose spigots. One to run to the temporary “garden house shower” and the other to the RV.
That will leave the electrical wiring for a future trip, adding a pressure tank between the pump and spin down filter (reduces the work the pump has to do), as well as the grey water management system and filtration — both future projects we will write about here.