
The Expert Power 100 W 12-volt solar kit with battery was a quick-and-easy “all in one” solution for the start of our off-grid power journey at Rally Creek. It had the solar panel, charge controller, and battery along with the wires to connect everything. Even better, it would arrive in a week or so (despite the Amazon Prime two-day shipping label) with everything that would be needed to get started generating solar power and driving a load.
The original intent was to power the single 0.7 amp exhaust fan in the composting toilet. This small 100W kit with a 21Ah battery could easily make that work. 21AH would theoretically run that fan for 10 days straight before needing a recharge on the battery. A perfect setup, and with the added bonus that we would have extra power to charge a phone or tablet as needed — or possibly even provide some low power LED lighting in the cabin at night.
Kit Delivery
Maybe the universe had my back, but the kit arrived late for our weekend departure to Rally Creek. Despite the promise to arrive early enough for departure, the kit ordered on June 28 (Wed) arrive on July 7th (Friday) — a full 9 days later despite the “6 days” original promise. This has been a trend on Amazon lately where most “Prime 2 Day” listed items take a full week, and even then the promised delivery date is missed by at least 24-48 hours. Yeah, first world problems, but keep that in mind when ordering these kind of items from Amazon if you need them at a specific time for a project. Order early.
Also, UPS, in typical fashion did a not-so-stellar job with handling despite large “Fragile” stickers plastered all over the place. The box with the battery, mounting equipment and cables was busted open and looked like it was in a street fight. Thankfully those components are sturdy and lived through the ordeal. The solar panel, also marked the same way, arrive intact but with a small dent in the frame. If we were worried about appearance this would be a return and damage claim with the seller and UPS. Not an issue, but something to take note of.
Some Prep Work Required
When I said the “universe had my back”, this is the reason why — at Rally Creek the same tools are not on site for the work that was needed to make this kit useable “out of the box”. While we could have made it work with the razor knife and a screwdriver on site, to do the job well it needed more work. It turns out none of the wiring that connects to the charge controller is terminated. While you COULD just strip the wires and put them into the screw-down terminals on the charge controller, it is not recommended.
The better option is to “tin” the wires by applying solder to hold them together and either crimp or solder the tinned wire to the spade connectors provided in the kit. To do this properly you’ll want to have wire strippers that can handle smaller gauge wiring (16 – 22 gauge I’m guessing) , a decent soldering iron with all that goes with it. The job took about an hour to add the spade connectors to the solar panel cable ends and the battery lead ends after stripping, tinning, and adding the spade connectors.
You’ll also find that the screws included for the battery terminals are too small and slip right through the round connectors on the battery connection cables. Maybe my battery was missing the proper terminal screws. Thankfully there was a set of 4 different screws , one pair of which has lock washers and regular washers just big enough to prevent the screw from passing through the cable. Oddly the pack with the longer screws had the washers, but the screws are too long for the battery terminal, thankfully the shorter screws without washers in the other pack worked fine.
Overall it works well and required minimal prep but if Expert Power took 30 minutes of prep time to make this a true turn-key solution it would be even better. I’d give them 3.5 stars overall on price , quality of product, and shipping if Amazon allowed for half-stars. Given they do not allow for that, I’d have to rate them 3 stars overall. Meeting shipping timelines, using a better shipping service to avoid damage, and having the kit prepped with spade terminals and the proper washer/screw setup for the battery would get them to 4-5 stars — 5 stars if the kit performs over time.
Initial Solar Power Experience
Overall the performance is probably what is expected for a starter kit. As a newbie to solar (PV – photovoltaic) power , I wasn’t sure what to expect. Let’s dive into my initial experience.
Ultimately I got this setup to power a small 12v 0.7A fan for our composting toilet. After more than a week of playing with this setup, I think it will work fine for that task. I also think there will be enough extra power to charge up the LED table lamps via the built-in charge controller USB port (more on that later).
On to the initial experience…
After doing some of the initial setup to get the proper connectors “all welded up” to make it easy to connect the solar panel and battery to the charge controller, it was time to test this puppy out. I brought the entire kit onto the back patio at my Charleston South Carolina home , connected the battery to the controller, connected the test load — a power-sucking (5.5A) test dehumidifier kit I’m playing with, and connected the solar panel. I brought the solar panel out to the yard pointing it somewhat toward the sun and started playing.
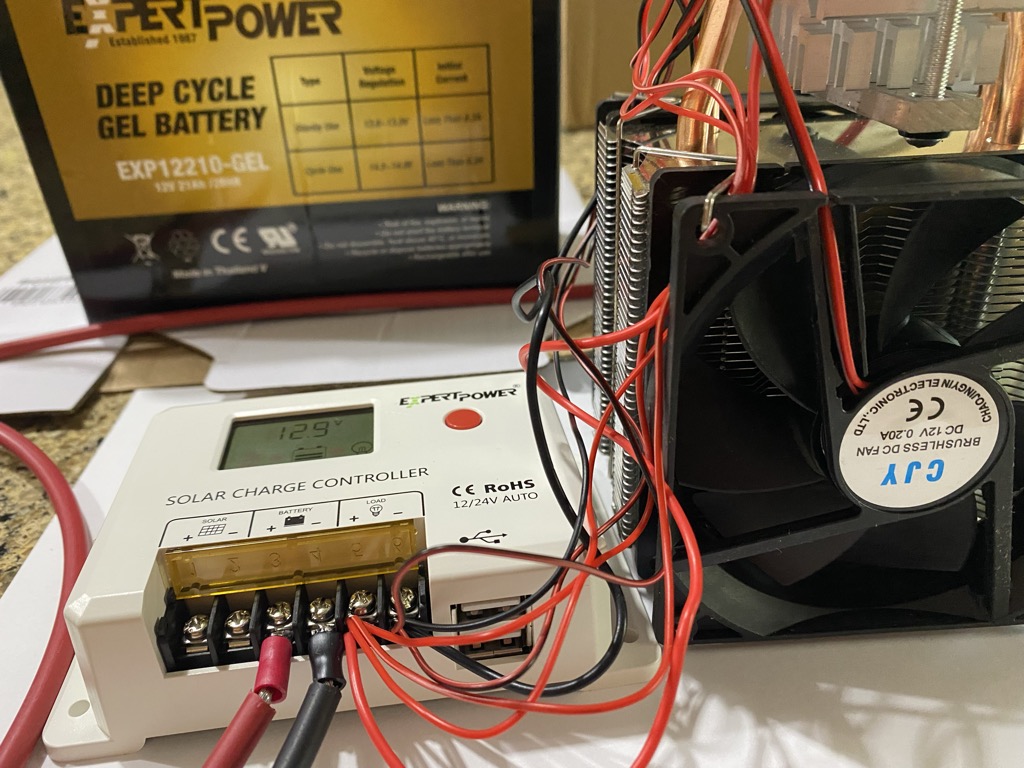
Turns out the initial “on arrival” charge state of the battery ran the 5.5A load for a while — a few hours. However it was fairly obvious that the solar panel, while rated 100W and pushing over 12V was not going to keep up. Pointed somewhat toward the sun the output amperage from the panel was only 2.5 – 3A at most. With the battery half full and the PV only pushing in half as many amps as were being taken out, the battery and thus the dehumidifier was done after a few hours.
Over the course of the first few days I tried various panel positions and learned a few things, but the first big takeaway…
You cannot count on the advertised solar panel output to ever be realistic.
While I figured that would be the case, I did not expect the actual throughput to be 80% BEST CASE and 50% output on average. Far less than any other business venture, scientific case study, or real-world experiment in virtually any other research I’ve done. Solar is waaaayyyyyy overselling the capabilities based on this very small sample set performed by “back yard scientist” and “solar wannabe”.
The system itself, however does work as advertised. It has all the pieces that are needed to get power from the sun, store it in a battery, and operate a low-amperage load.
Perfect for the initial use case.
Solar Power Use Case Calculations
That said, for my use case I can probably only count on a typical solar output of 2.5A on average over the course of a sunny day in the upstate. The likely solar exposure I’m guessing will be 6h in winter to 9h in summer — an average of 7.5 hours/day. In the summer, we can gather 22A on sunny days. In the winter only 15A.
For simple math, I’m going to base the composting toilet’s fan at 1A.
That means the panel should output twice the power needed, so even in low sun, partly cloudy skies, the PV should easily keep up with the demand. That means our 21Ah battery should be fully charged most of the time it is needed.
That also means we could run for almost a full day if there is no sun.
Real World Estimates & Tech Info
So a few things to note here about how this system is going to be deployed.
The Charge Controller
First of all, this basic low-cost charge controller has some cool features —
The controller has the ability to check in on power input and output in real-time (though not remotely and with only a few second window to press buttons and gather the data).
You can set an automatic “load on/off” mode with this controller. That is great. In addition to the manual “load on / load off” switch right on the controller you can set it to one of two modes I’m interested in: Run at night or Run during the day. In addition these “At Night” / “During Day” modes are setup to run the load for 2 hours, then rest for 15 minutes, cycling through until the PV senses daylight (or not).
Another feature is the built-in USB port — perfect for getting power from the 21Ah batter down to the 5v USB connection we need to charge our table lamps. Win!
Power The Composting Fan
I’ve not decided which mode I’ll use — likely “run during the day”, but this is perfect for the composting toilet. The “best use” for these composting toilets is to not dry out the composting material (peat moss) — which WILL happen if you run the fan 24/7. Running the fan 24/7 they recommend turning it off after 10 days if you’ve not been using the toilet.
Here we can run the fan all day with it on for 2 hours, then off 15 minutes. It will also be off during the evening. Since the toilet is already no-odor/low-odor there is little concern over that — we just want to make sure there is some air flow to dry thing out “enough but not too much”.
In “run during the day” 2h on the panel should easily keep up and charge up our battery for rainy days running.
In addition, that battery should have more than enough power to let us plug in and charge the table lamps as needed.
Basic Solar Panel Lessons
Point The Panel At The Sun
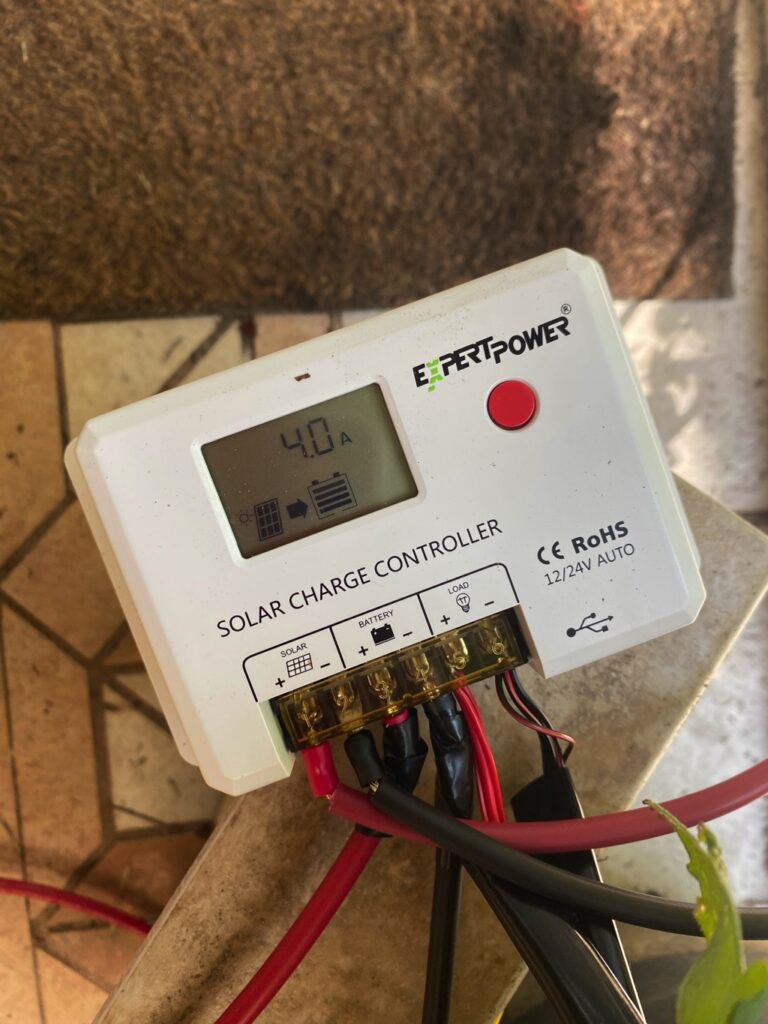
This is something most people probably know, but there is a fairly notable difference on the power output when the solar panel is pointing directly at the sun. The more “off angle” it is the less power it generates. While I never saw this panel generate anywhere close to 5A, I did get it to 4.2A with a couple of tricks. Getting the face of the panel pointing directly at the sun – more to the east in the morning and to the west in the evening made a huge difference. Also the angle of inclination, which will change with the season — higher in the sky means a “flatter angle” in the summer and a “steeper angle” in the winter also seems like it will play a role.
Leaving the panel in a single “south-facing” position meant generating < 1A in the morning and evening and 3.5A+ in the middle of the day.
That puts a “solar tracker” that automatically tilts the panel toward the sun on the list for a future research project.
Clean The Panel
Yeah, the solar propaganda all says that the panels do fine without regular cleaning. I’m not so certain about that. When the panel arrived it had a film of “schmutz” on it. Not super dirty, but clearly the panel had picked up a lot of stuff from the environment through manufacturing, boxing, shipping, and sitting in the warehouse. Not dust really, but a thin film of general pollution like you get on the inside of a car window over time.
Average Output before cleaning the panel: 3.5A
Average Output after a basic cleaning to remove grime: 4.2A — same position, sunlight, etc.
Now that the panel has been outside for a week with birds using it for target practice and only one rain storm to sort of almost clean it — output is back down to mid 3A to high 3A range. This seems to be the “general state of panel schmutz” and thus I’d expect that the panel is going to be pushing 3.5A max during peak sunshine.
Other Factors
Other factors seem to also come into play from general research I’ve done. Length of the cables with a DC powered system will degrade voltage and thus amperage and wattage output will suffer.
The charge controller and other electronics will introduce a loss — inverters, etc. all have general “heat loss” or “efficiency” loss built into the system. The best electronics run 95% efficient (5% loss of power) but low grade stuff like we are playing with here will only be 80% efficient. That is for each piece of the puzzle.
Takeaways
Overall I anticipate this PV / Solar Panel based system to run at maybe 50% efficiency on average. I’m guessing that without spending a lot of money on the highest grade equipment with all the latest tech, getting 85%+ of your rated solar panel output is a pipe dream.
For any future projects I’ll be basing my solar panel calculations on half their advertised output and if they perform better than that I’ll consider it a bonus.